Many have described the Battle of Whitemarsh as a series of small skirmishes, however in a larger context, I’d describe it as strong defensive strategy by a very weak Continental Army while the British Army offensive strategy looked for, and eventually gave up on, an acceptable approach to attack. I’d also classify this as one of the few and far between victories for Washington since he wisely maintained his defensive positions and did not further pursue clearly failing offensive maneuvers as they occurred; they held the field afterwards, denied another British attempt to destroy the Patriot army; and the British retreated to Philadelphia at the end of the battle.
That being said, the British loss is mainly due to Howe’s not flanking even further on the exposed Continental far-left flank. Howe was reluctant for a frontal assault on Washington’s fortified positions (he did not have anywhere close to a three-to-one margin, and was always shy of uphill, frontal assaults since Bunker Hill). This, along with several other factors led him to toss it in and return to Philadelphia for the winter, those factors mainly being a shortage of supplies, bad weather and tired troops.
Several forum participants have made some great posts on Whitemarsh this past year, but I am going to post some additional pictures and narrative to supplement what people have done before.
Myself and my good friend, Dave S., recently did the Battle of Whitemarsh Driving Tour as other forum members have done. The link to the tour website and maps are at the end. The overall battleground covers a large area that is more than six miles East to West and six miles North to South. The tour will take around four to five hours, depending on how long you spend at each stop, how many U-turns you end up doing, etc. During the tour, we had a great lunch at the Iron Hill Brewery in Chestnut Hill, and so if you are making a day of it, spend some time in this great shopping area with plenty of bars and restaurants. All the pictures I am posting are marked with a letter in the upper, left-hand corner that corresponds to the letter locations on the map I have posted first.
All-in-all, we enjoyed the tour, however this is not for everyone except the seriously interested AmRev buff. There are not many “exciting” stops and are only few interpretive panels at a couple of locations, so it is important to read the driving tour narrative to understand what is going on. Since the locations are mostly suburban residential, it takes some strong imagination and AmRev passion to put yourself into the battle. The driving tour narrative is not bad, and the maps are helpful, but I would also suggest bringing along Thomas McGuire’s “The Philadelphia Campaign: Volume II” and referring to that along the way. He devotes a chapter to November & December 1777 leading up to Valley Forge (the battle description starts on page 238). And/or David Martin’s book: “The Philadelphia Campaign: June 1777 – July 1778”, although I have not read this and do not own a copy.
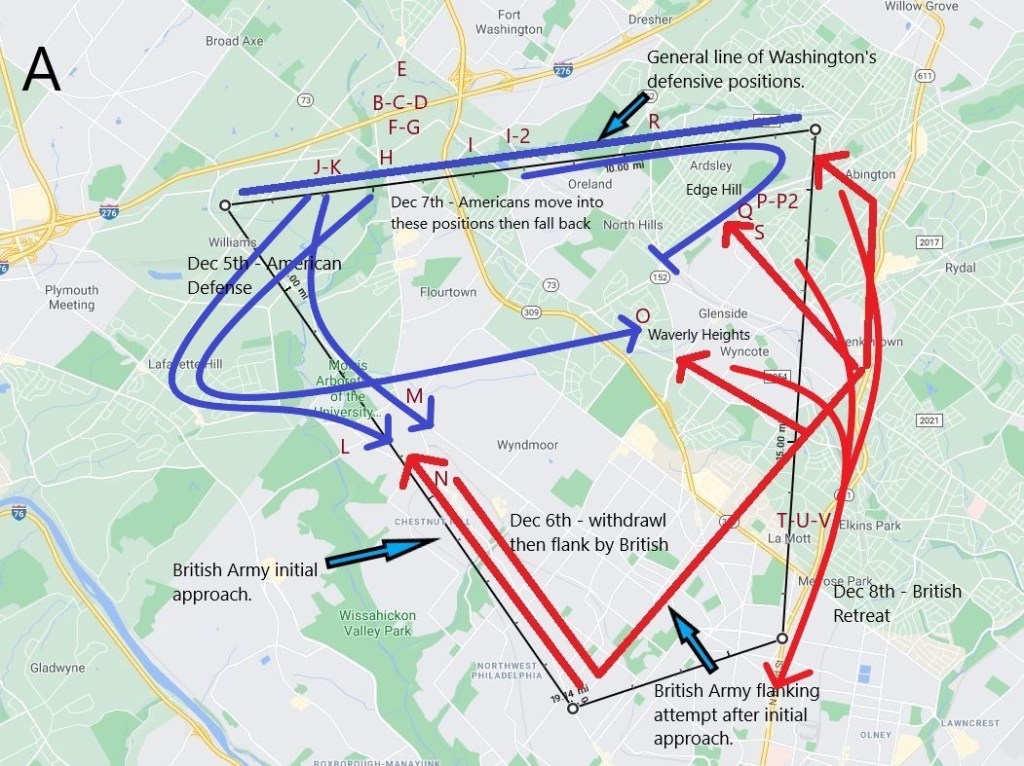
Photo A: Overview of the battle with photo locations marked by letter. The area is Southern Montgomery County, almost all below the Pennsylvania Turnpike that runs East-West.
Photos B-C-D: The first stop on the tour, the Fort Hill location, in Fort Washington State Park. This is the center hill in the American line with Militia Hill to the West and Camp Hill to the East. B & C show the remains of the redoubts looking south towards Philadelphia and D is looking north. Notice the bottom photo on D and the trees in the center distance which will give you some idea of how high these hills are compared to the near surrounding countryside. The Continental Army had spent all of November 1777 in these positions, so their defenses were well established.
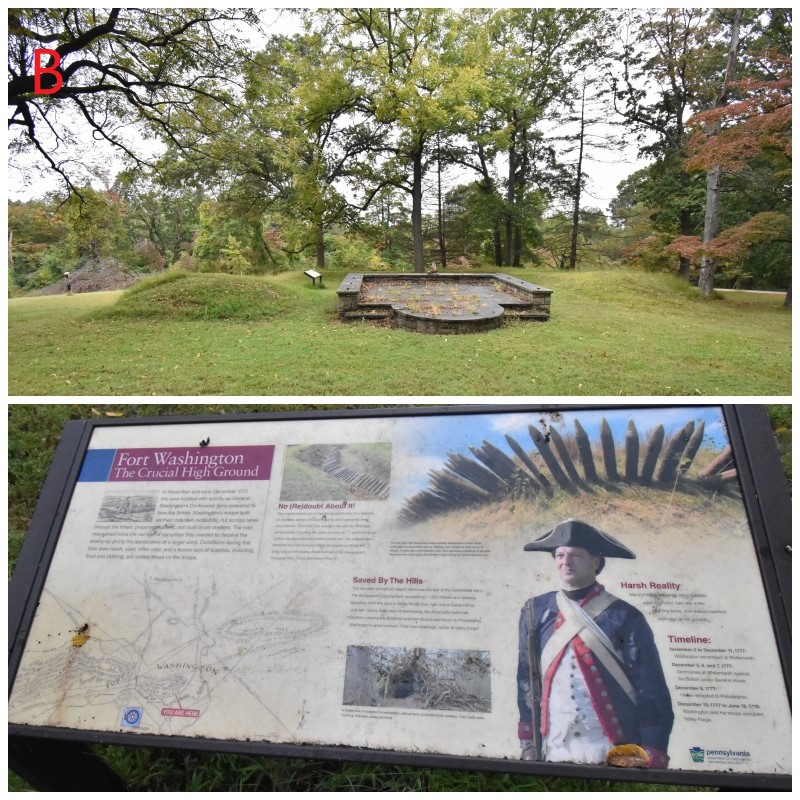
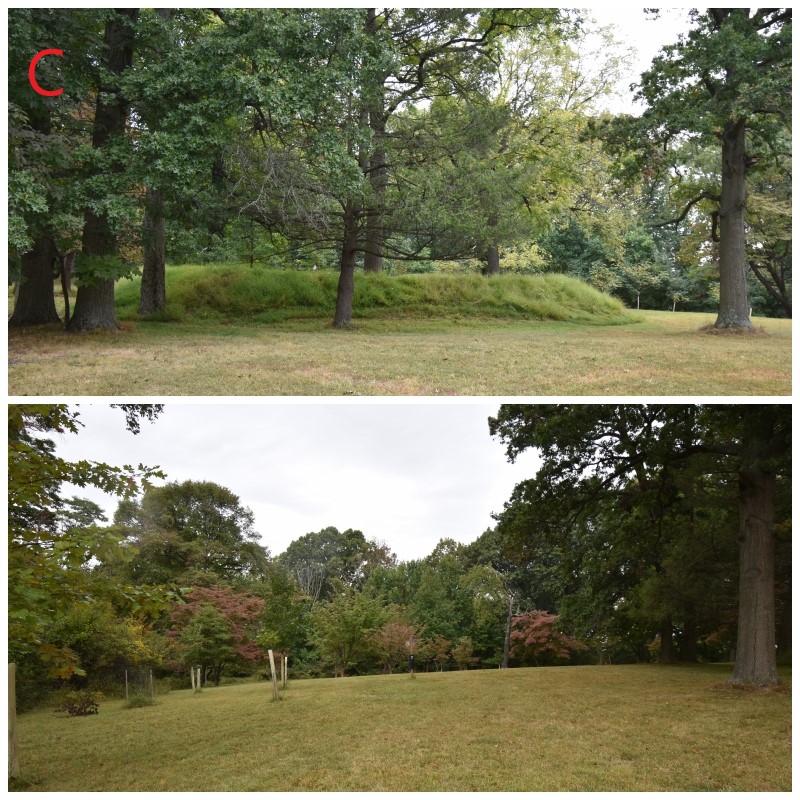
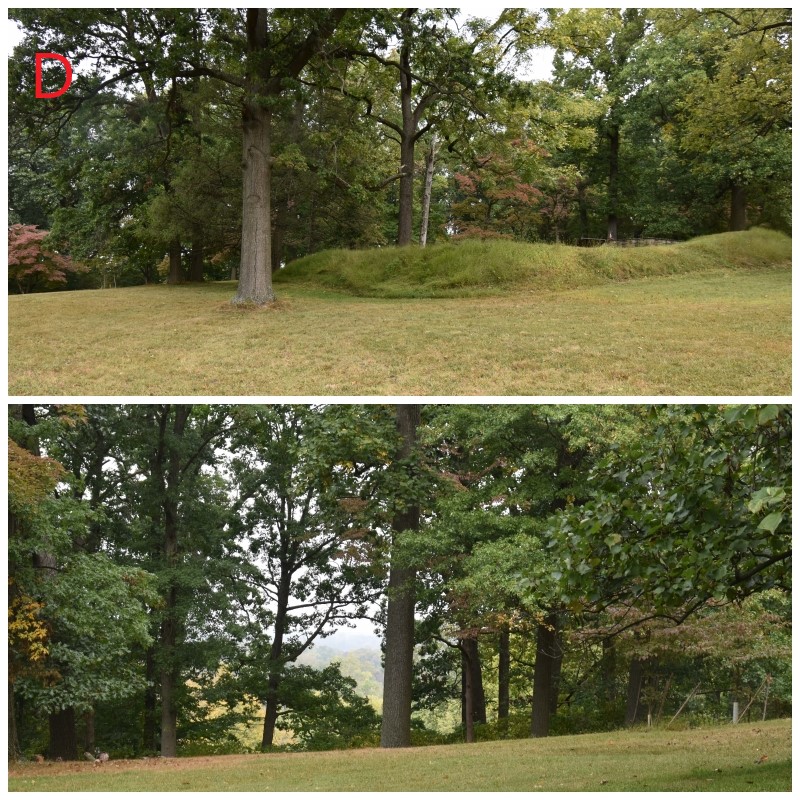
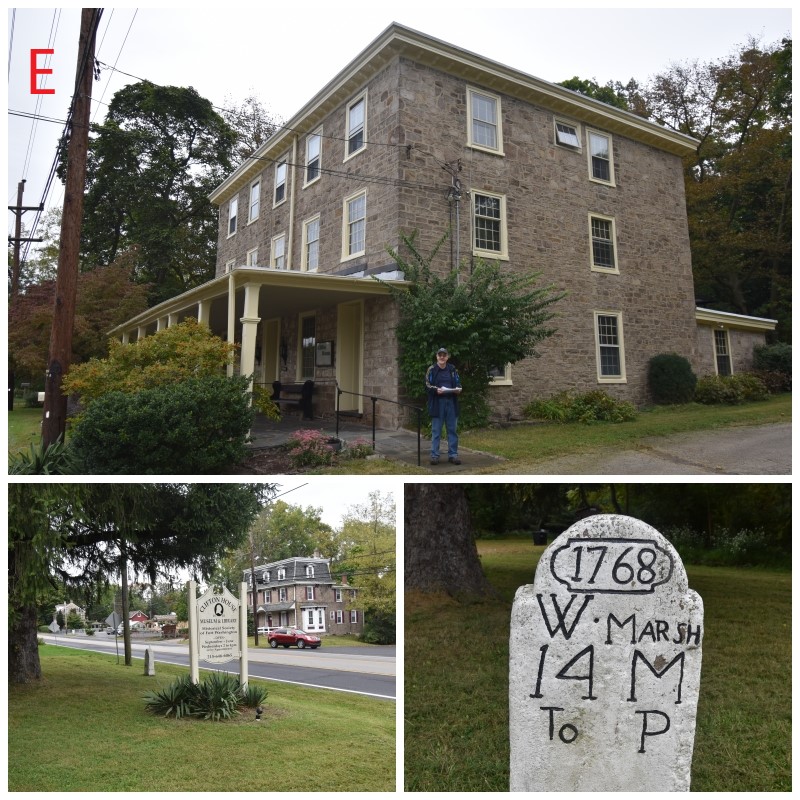
Photo E: Clifton House – Located on Bethlehem Pike to the rear of Fort Hill, Continental officers Quartermaster General Stephen Moylan and Colonel Clement Biddle were billeted here. This is not the original building present here at the time of the battle, having been destroyed by fire several times and rebuilt. It is the Historical Society of Fort Washington headquarters and museum (currently closed due to Covid). The building is owned by the PA State Department of Conservation and Natural Resources.
Photos F-G: Hope Lodge – Built in 1740, Washington’s chief surgeon, John Cochran, and other physicians resided here and used as a hospital. It is located between Fort Hill and Camp Hill on Bethlehem Pike. The picture of the grounds is facing west towards the Pike and is easy to picture Continental troops and others occupying the ground around the building, which is now a museum that is owned Commonwealth of Pennsylvania.
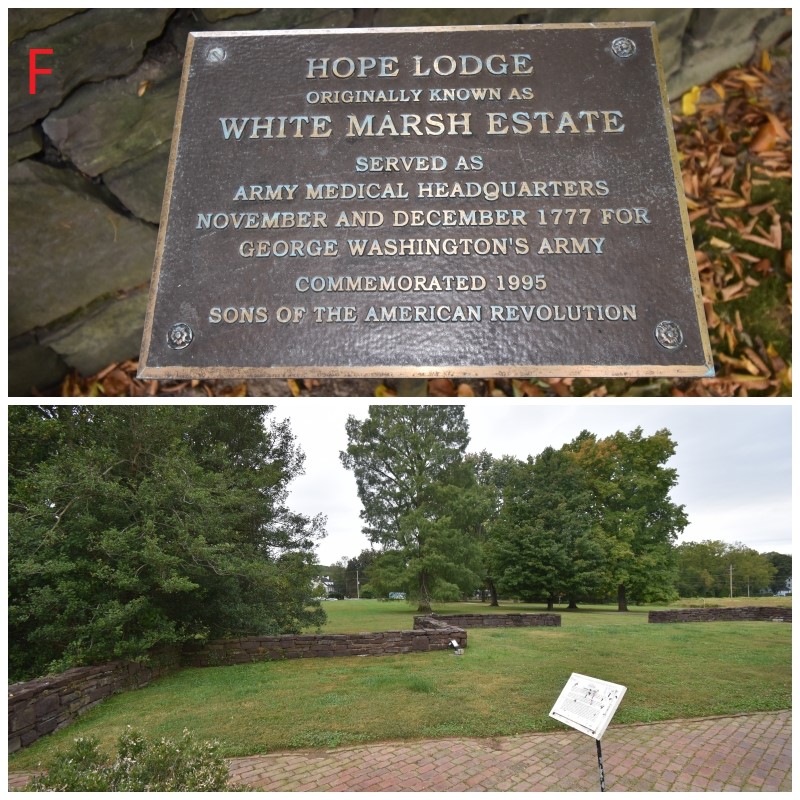
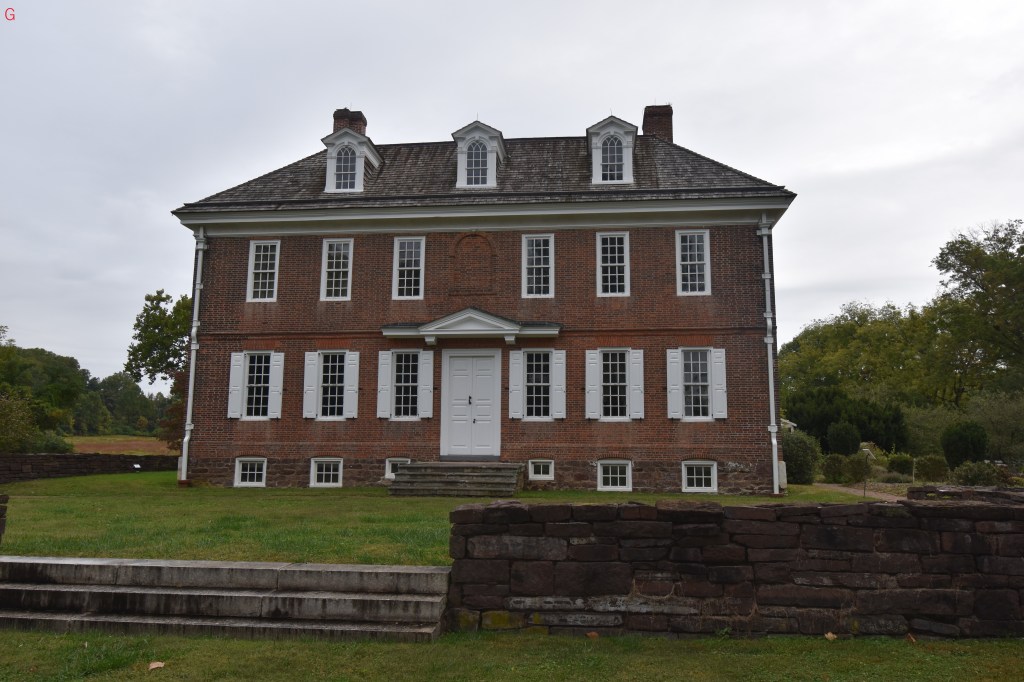
Photo H: St. Thomas’ Episcopal Church is located on a hill above the intersection of Bethlehem Pike, Church Road and Camp Hill Road. Washington stationed four hundred troops with artillery to command this position in front of the main line running from Militia Hill to Camp Hill. The top view is overlooking Bethlehem Pike, and the bottom right view is the present-day church. The bottom left view is the location of the original church at the time of the battle. It was a small stone church and was replaced in 1818.
David Martin in his book: “The Philadelphia Campaign: June 1777 – July 1778” writes that after the first engagement at Chestnut Hill, British Lt. Col. Robert Abercromby advanced and captured St. Thomas Episcopal Church. When Howe arrived, he climbed to the top of the church’s bell to reconnoiter the Continental lines. Instead of pushing the attack further, the British shelled the American lines but failed to do any damage because of the distance and range of the artillery.
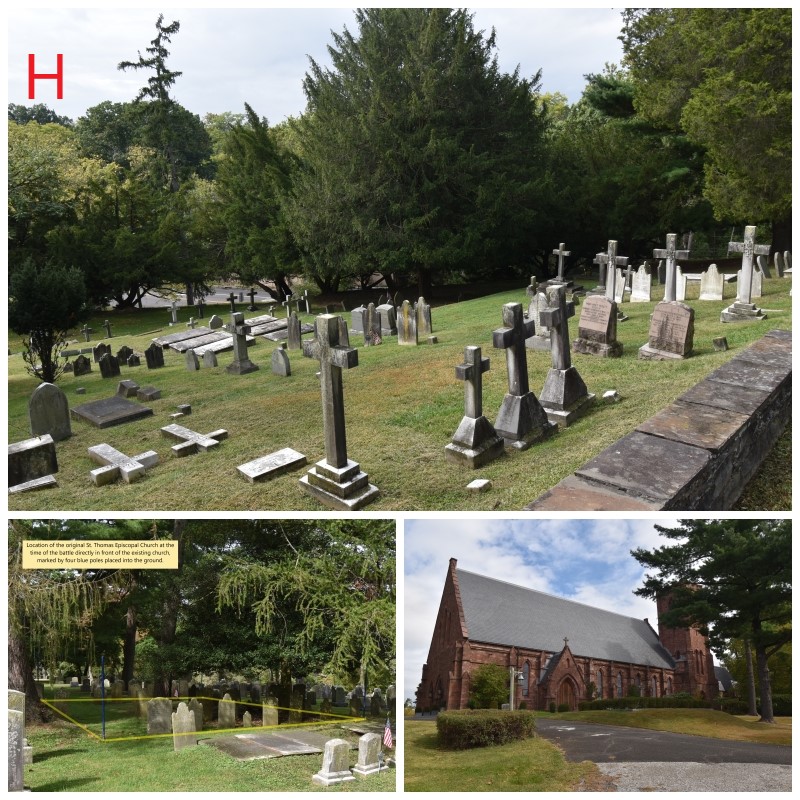
McGuire mentions none of this besides Washington posted troops here. I have not read Martin’s book nor seen his sources, and I have not read any primary sources, so I cannot say for certain. I have also read elsewhere that the British camped here, which seems not to be true at all, camping the night back at Chestnut Hill. Also, this is a very steep hill rising one hundred and twenty feet over a truly short distance. I would be surprised if the Continental regulars gave up their posts at the British advance and a successful attack by Abercromby’s light infantry (37th Regiment of Foot) would have been a remarkable and violent clash with primary sources referring to it and more written about it. Lastly, I am skeptical about the claim that Howe climbed the church bell tower. It was not at all a large church and I would be surprised if there was much of a bell tower at all, however again, I have not seen any primary sources confirming or denying this claim. There is a footnote in the PDF copy of the driving tour that also mentions this it’s likely being confused with a rear guard action after the Battle of Germantown.
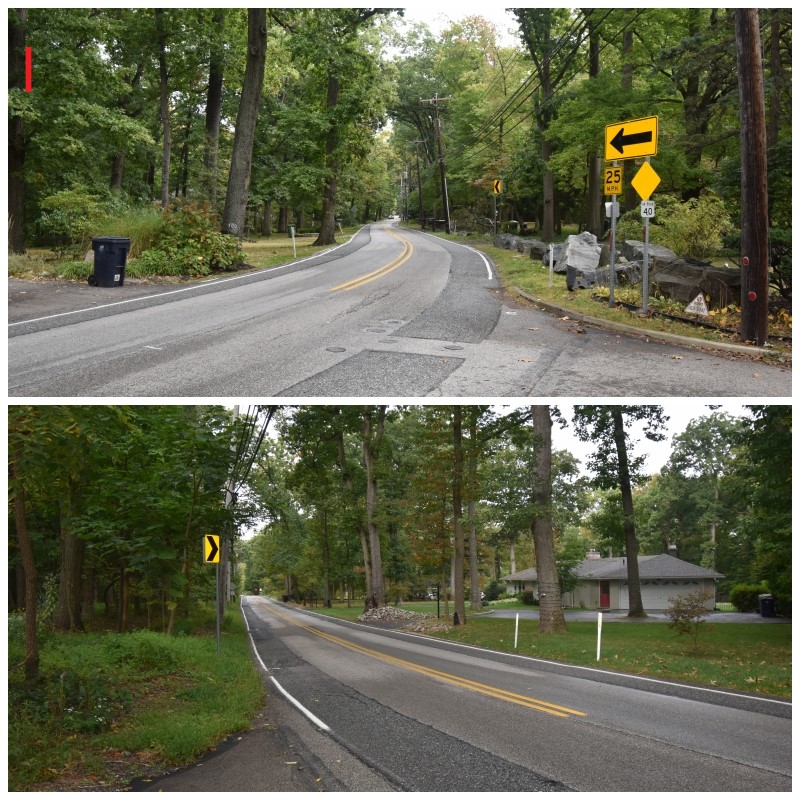
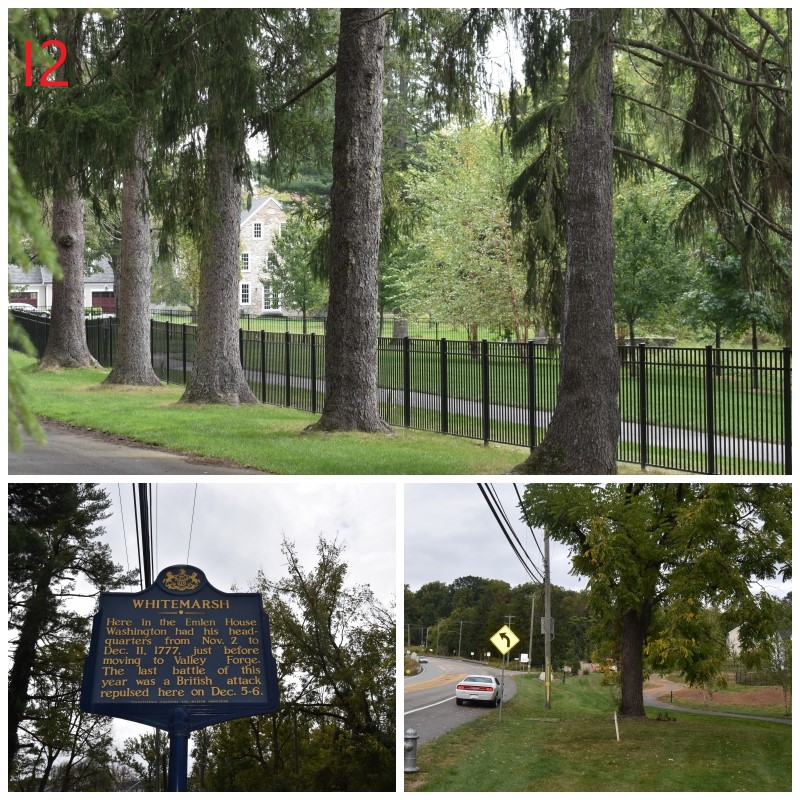
Photos I-I2: Continental Line and the Emlen House, along Camp Hill Road looking east toward Washington’s HQ and west back towards St. Thomas Church. Troops were stationed along this line extending about two miles to the east, as well as Camp Hill, which was to the North of this line. Just South and below this line is the Emlen House which served as Washington’s Headquarters during the battle. The home is now a private residence and not open to visitors. In the bottom-right photo, the Continental lines were located to the left and background uphill from the Emlen House. (Take note of the white, 2014 Dodge Challenger, which has visited almost as many AmRev sites as I have.)
Photos J-K: Militia Hill, located in the Fort Washington State Park off Militia Hill Road. This location was the far right flank of the American lines and was occupied by the Pennsylvania militia (hence the name) under Potter and Irvine, and the 2nd Connecticut Regiment of the Continental Army (I’m sure there were some regulars cursing the fact they were paired up with the militia who had a terrible reputation, deservedly so.) At this site is an observation tower (primarily for birding, see interpretive panels in photo K). The top view in photo J is looking southeast towards Abington and Jenkintown; the middle view is looking south towards Chestnut Hill and Germantown; and the bottom view is looking west up the hill towards where the American troops were camped. Years ago, I camped here several times as well with my son in Cub Scouts, I wish I had known more about the battle back then.
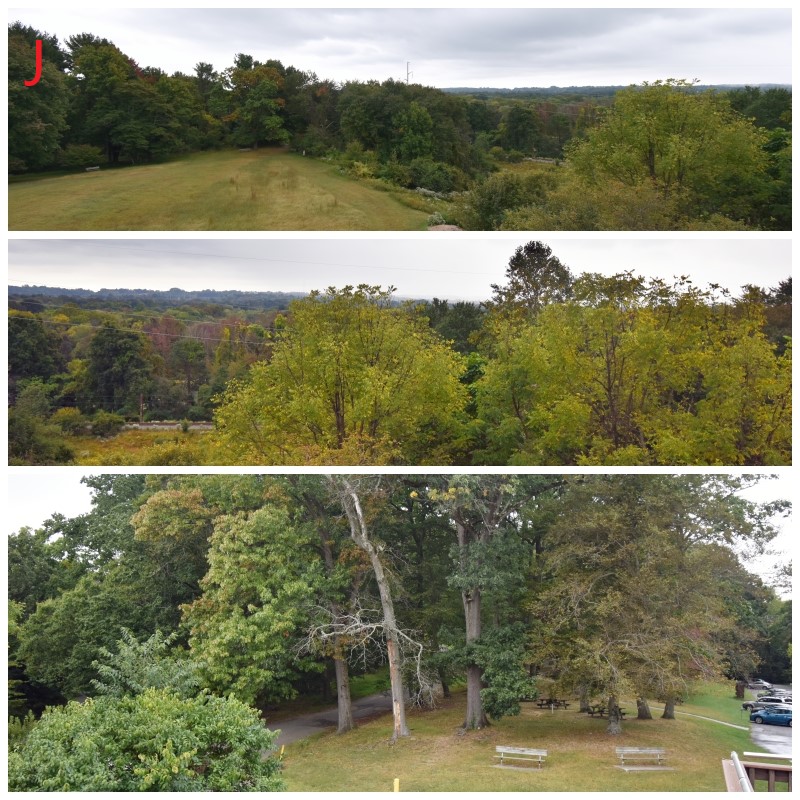
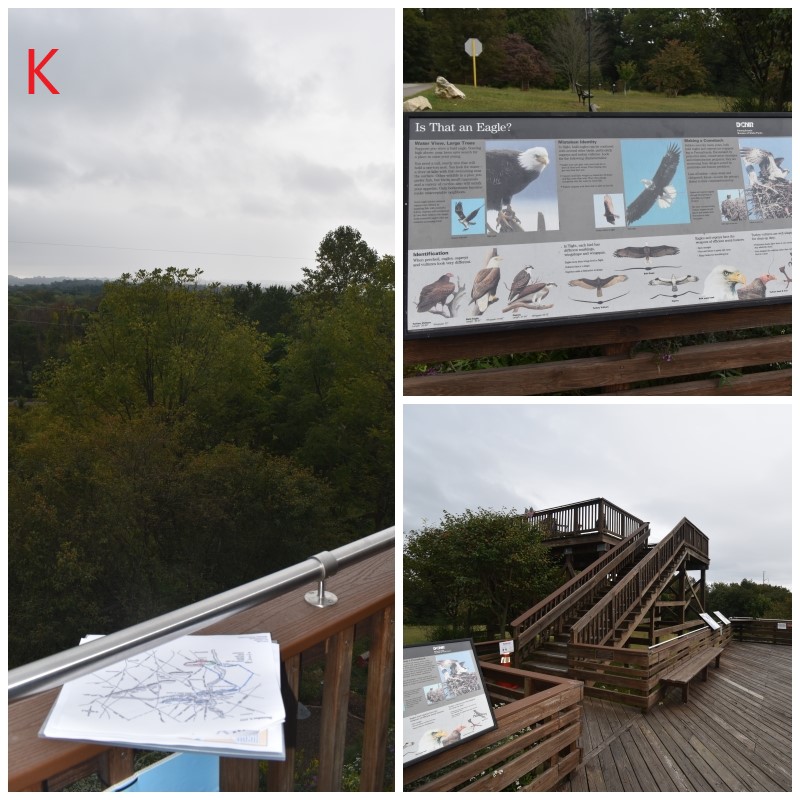
Photo L: Germantown Pike at Wissahickon Avenue. Left to right is Germantown Pike. On December 5th, 1777, Potter’s PA Militia and the Connecticut regulars advanced down the pike towards British positions to the right beyond the picture at Chestnut Hill. At the same time, up Wissahickon Avenue and to the right about a mile, Irvine’s PA Militia advanced on the British positions on Chestnut Hill. The British advanced down the hill against both attacks, with Potter’s militia fleeing immediately. McGuire writes that the Connecticut regulars made a brief stand but then also fell back.
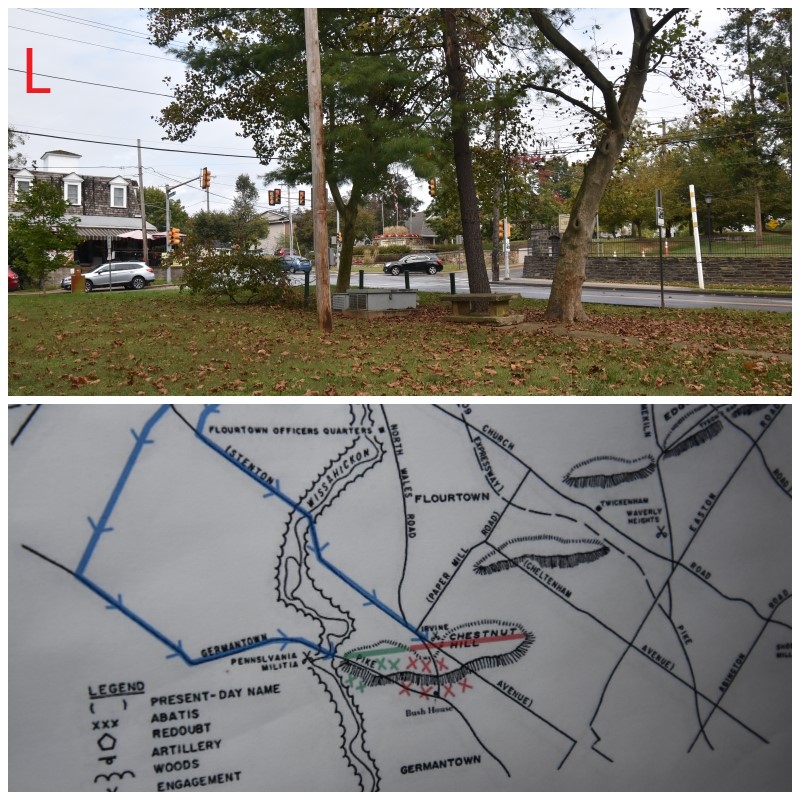
Photo M: View Northeast of Stenton Avenue looking up Chestnut Hill past Paper Mill Road. This photo is taken from the grounds of the Philmont Christian Academy. As mentioned in the previous photo description, Irvine’s PA militia with about six hundred men advanced from the rear of the viewer up the hill in the top photo towards the British Light Infantry stationed on Chestnut Hill. The militia fired the first volley, but then fell apart under the British advance. While trying to rally his troops, Gen. Irvine was shot and fell from his horse. Completely ignored by his fleeing soldiers Irvine was subsequently captured by the British.
The location of Irvine’s capture is about half a mile away in the center of the top picture. This is shown as a footnote in the driving tour narrative. We unfortunately did not visit this marker. The American army fell back to their positions at Militia Hill. It is at this time it is claimed that the British followed and advanced to St. Thomas’ Church, however if they did, they eventually moved back to Chestnut Hill for the night.
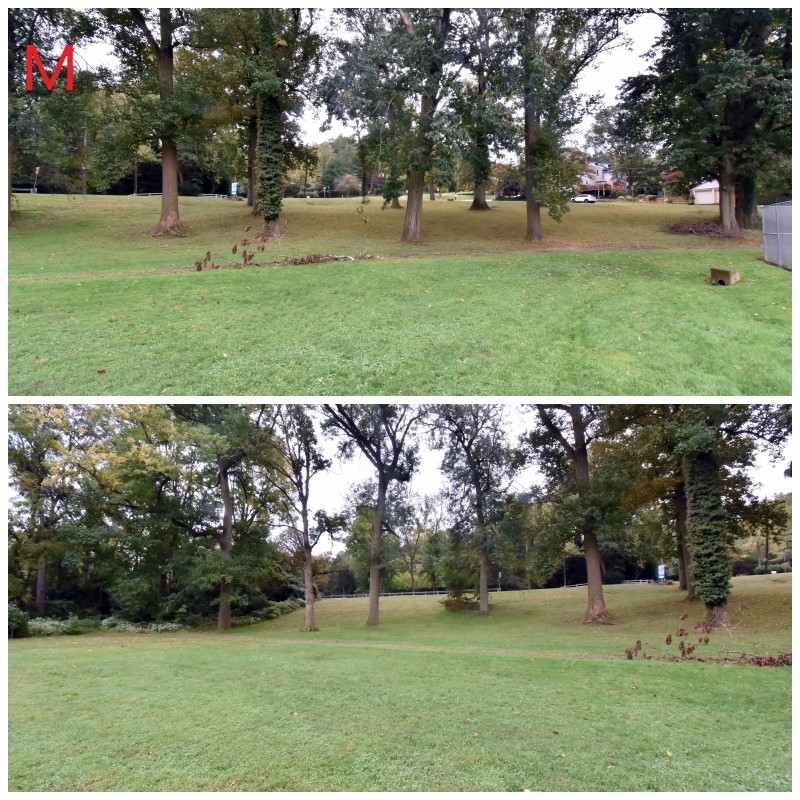
Photo N: Howe’s Headquarters at the intersection of Germantown and Bethlehem Pikes. The top photo is the location on the northeast corner of the intersection which was the Matthias Bush house, Howe’s headquarters during the 5th and 6th of December. This is not the original building. Irvine’s attack on the 5th started about a mile down the road to the right, Bethlehem Pike. Potter’s attack on the same day occurred a little over a mile down Germantown Pike to the left.
The bottom picture is looking down Germantown Pike, southeast towards Germantown. On the night of the 4th into Dec. 5th, the British Army moved as one column towards the camera from Philadelphia, pushing back the harassing Continental pickets along the way as they advanced. Once reaching this point, Howe formed a line from the Wissahickon Creek on the left comprised of Hessian Jagers – who would push back Potter’s and the Connecticut regulars later in the day on Dec. 5th ; and to the right about a mile comprised of two battalions of light infantry who advanced against Irvine’s attack that day. The same light infantry that may have advanced later in the day to St. Thomas’ Church.
After the action on the 5th, there was no significant skirmishes on the 6th besides pickets and foraging parties tussling and Howe waited for Washington to do something, although the American general was content to sit and wait himself. Howe grew frustrated and on the night of the 6th-7th withdrew his troops from Chestnut Hill, marching down Germantown Pike (away from the camera) with a plan to flank the Continental’s left on Camp Hill. As they proceeded down Germantown Pike, the British torched and burned many buildings along the way as punishment for the harassment received two nights earlier.
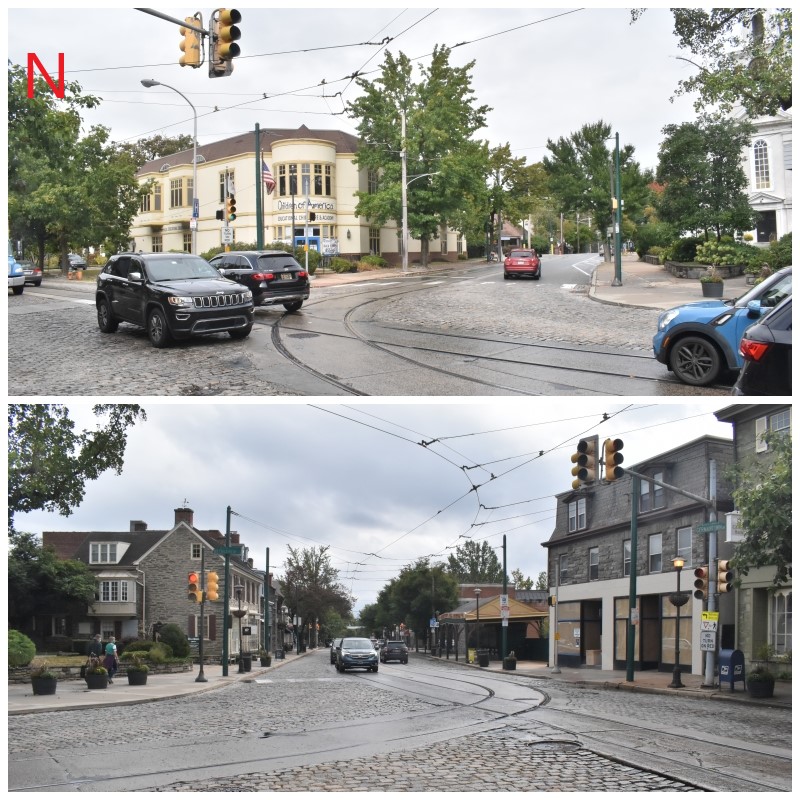
Photo N2: Germantown. The British army now passed back through where they had fought two months previous, and although there was no Battle of Whitemarsh-specific activity, I am including these Germantown photos. I doubt I will do any specific posts on Germantown, considering the coverage it is getting with Michael Harris’ new book: “Germantown: A Military History of the Battle for Philadelphia October 4, 1777” and most of the historic sites there are either completely closed due to Covid, or only open during the week with very limited hours. The top right photo is Cliveden, or the Chew Mansion, then center piece of action during the October battle. Both the grounds and building were closed on the Saturday we were there. The lower right picture is a mile-marker on the grounds right at Germantown Pike. I thought it was cool. Lastly, the photo on the lower left is Upsala. This mansion is located across Germantown Pike from Cliveden, but the current building was not built until 1797. Both armies maneuvered over the grounds and past the original house that day. Though the current building is not significant to the battle, it is still a great story. Now it is privately owned by a young couple who are actively restoring it to their liking. If you’re into restoration or old buildings, they have great social media accounts and you can check out their webpage here: https://historicupsala.com
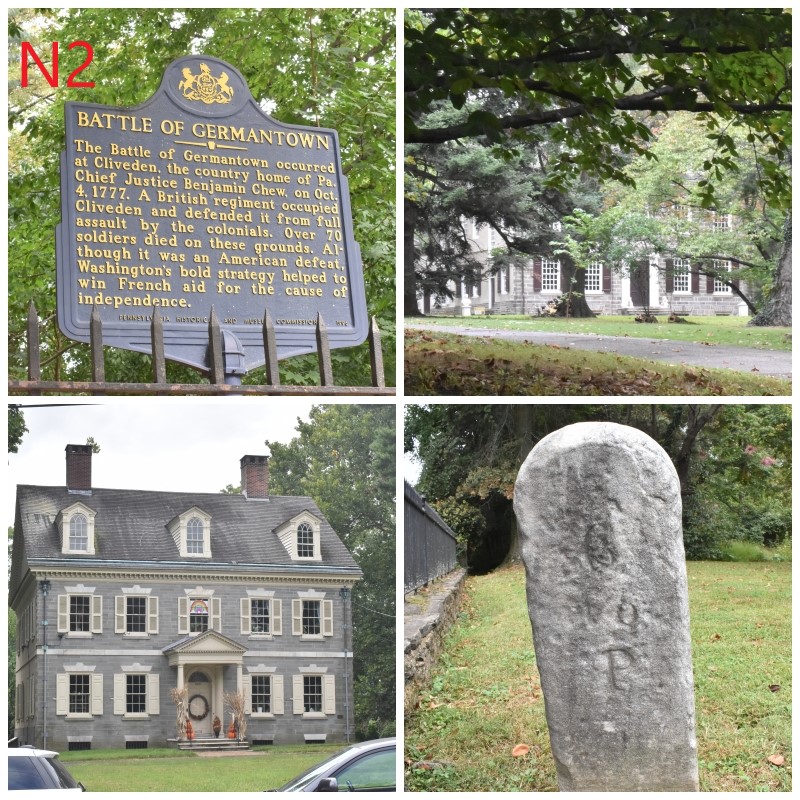
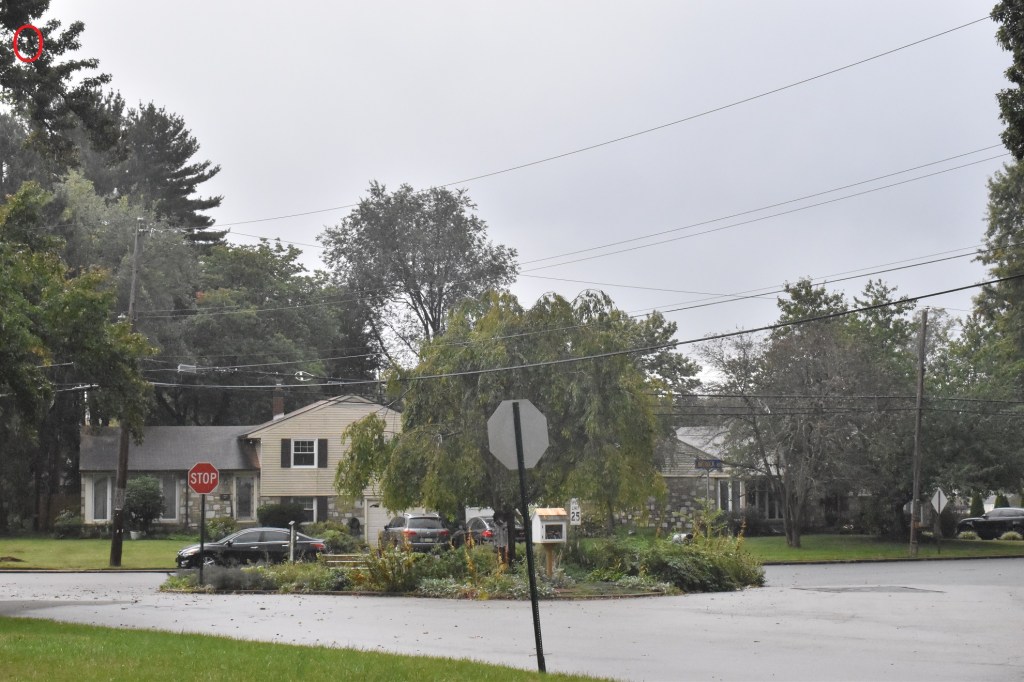
Photo O: Center of the action during the skirmish at Waverly Heights. We hit this spot during a downpour and did not get out of the car, and there is really nothing to see here. This intersection in the northern end of Cheltenham Township marks the center of the action on the left flank of the British advance on December 7th.
Overnight on the 6th and 7th, Howe abandoned his position on Chestnut Hill and marched down Germantown Pike through Germantown. The army turned left onto Abington Road, present day Washington Lane, moving northeast in attempt to flank the Continental Army’s left flank. First to peel off this march was General Grey who proceeded northwest up Church Rd to where it meets a small ridge, Edge Hill, running from Chestnut Hill to the southeast, to Abington towards the northeast. Edge Hill ran almost parallel to the Continental lines from Fort Hill to Camp Hill.
Earlier in the morning, Washington once again sent out Potter’s Brigade of PA Militia and Connecticut regulars from their post on Militia Hill to reconnoiter the front of the Continental lines and the eventually moved east and encountered Grey’s troops on the south side of Edge Hill, about three hundred yards to the left of this photo. The Continentals fell back to the crest of Edge Hill and regrouped, however in the meantime, Grey organized a flanking movement through the area of the photo. There was severe close-quarters combat in this area with the Americans eventually retreating towards the Continental lines. Grey continued to advance forward into the valley between Edge Hill and Camp Hill, up until Sandy Run, which flowed just in front of the American’s fortified defenses.
Photos P-P2: Battle of Edge Hill – Unmarked Revolutionary War Soldier’s Grave. This location is in a residential neighborhood on the sidewalk’s edge in between two homes. It’s easy to miss if there are cars parked along the street. The photos are a close-up of the monument and then a wider view featuring my friend Dave. The bulk of Howe’s army continued after Grey’s departure up to Jenkintown Road and Old York Road and then turned left to move toward the American’s on Camp Hill. Washington realized Howe was trying to flank him and ordered Daniel Morgan’s riflemen and the Maryland Militia under Mordecai Gist to move from Camp Hill southeast towards the eastern end of Edge Hill across the valley below the American lines.
Morgan and Gist’s troops began their approach to Edge Hill about one half mile North of this photo. They advanced up the north side of Edge Hill until they were met by Abercromby’s light infantry, and the Americans successfully pushed them back to the far side of Edge Hill. The British sent more troops in to dislodge the Continentals, but they held firm at the top of the hill. The photos are near the crest of the hill that Morgan’s troops held, with Gist’s militia forming lines on Morgan’s right. The British continued to attack and ferocious fighting ensued along the hill with the Americans fighting gallantly. Fearing being outflanked and overrun, they were forced to retreat and fell back to Camp Hill. Late in the day on Dec. 7th, after the American retreat, Howe moved his army even closer to the American center and left at Camp Hill looking for an opportunity to exploit any weakness in the Continental lines.
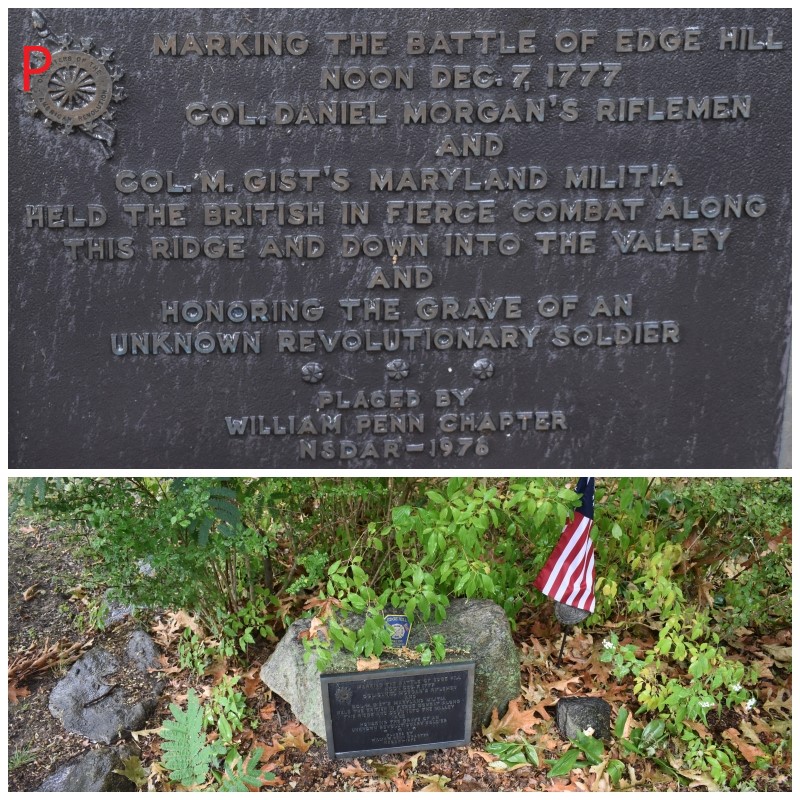

Photo Q: Edge Hill Woods Wildlife Sanctuary. This spot is located further west along the Edge Hill ridge that had been defended by the Maryland Militia and Morgan’s Rifleman. As with the previous location, this is in a residential area between two homes. Look for the unobtrusive wooded steps leading up from the sidewalk. This small patch of woods is mostly undisturbed since the time of the battle and will give you a good idea of what the area was like for the soldiers that fought there. Locations like this were unable to be farmed and so much of the fighting along Edge Hill from Waverly Heights up to the Unmarked grave and beyond were in wooded areas just like this.

Photo R: These photos were taken looking North on Limekiln Pike towards the American lines on the high ground past the shopping center in the top photo. To get to this spot, you pass the Thomas Fitzwater House on the left-hand side (bottom photo), over Sandy Run in the middle photo and across Twining Road to the shopping center. Towards the end of the day on the 7th, Howe grew increasingly frustrated at the lack of progress and his army’s inability to draw Washington out or dislodge his defenses. He decided to check out the situation for himself, and with several aides, he rode up the pike, past the Fitzwater House to the spot just below the hill in the top photo.
From this vantage point, concluding that the defenses were impregnable, supplies running low and his army tired, Howe turned to his aid, Friedrich von Muenchhausen and stated simply: “F@#k It!”. He wheeled his horse around and rode back to Philadelphia.
Well probably not. But he decided at that point to withdraw his army back to Philadelphia for the winter.
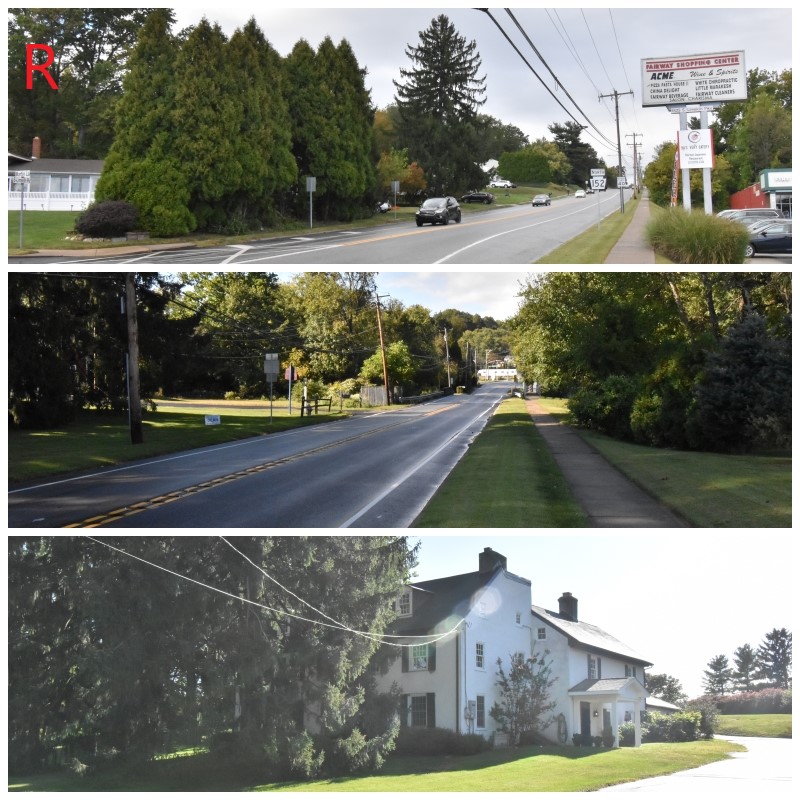
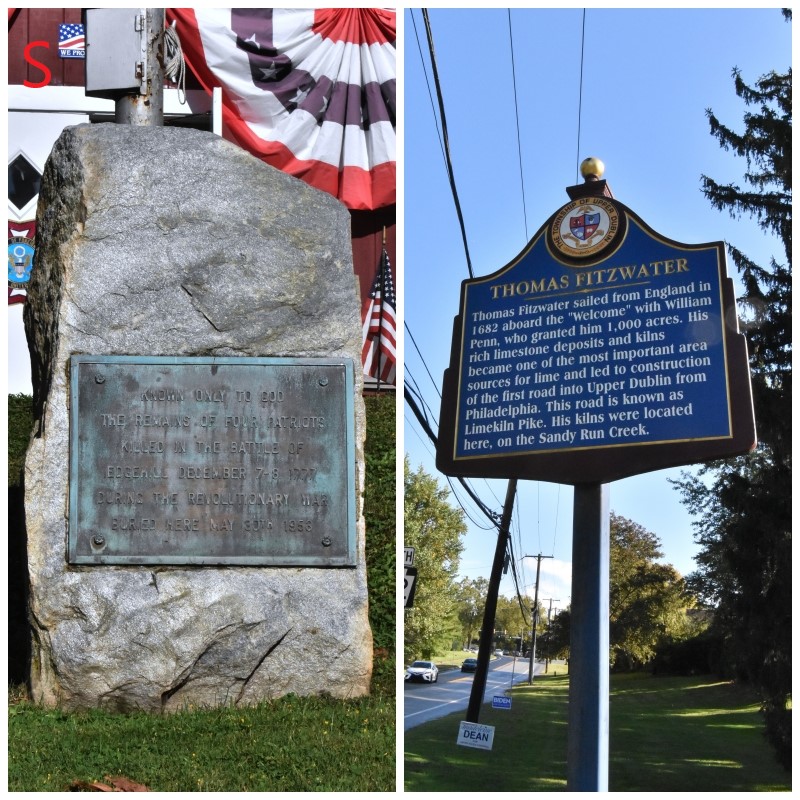
Photo S: A little less than one mile and a half down Jenkintown Road from the location in Photo R is the North Penn VFW, the location of the graves of four unknown American Revolutionary War soldiers who died during the fighting at Edge Hill. Their remains were discovered on the south side of Edge Hill a short distance beyond the rear of the VFW building and were re-interred here in 1953. The other photo is of the historical marker at the Thomas Fitzwater House, back up Limekiln Pike.
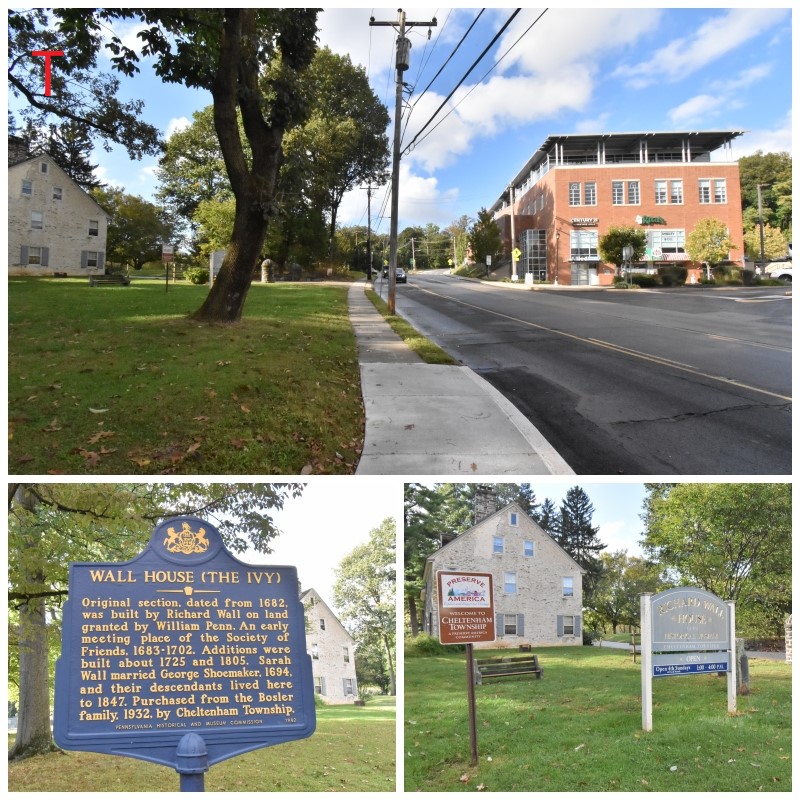
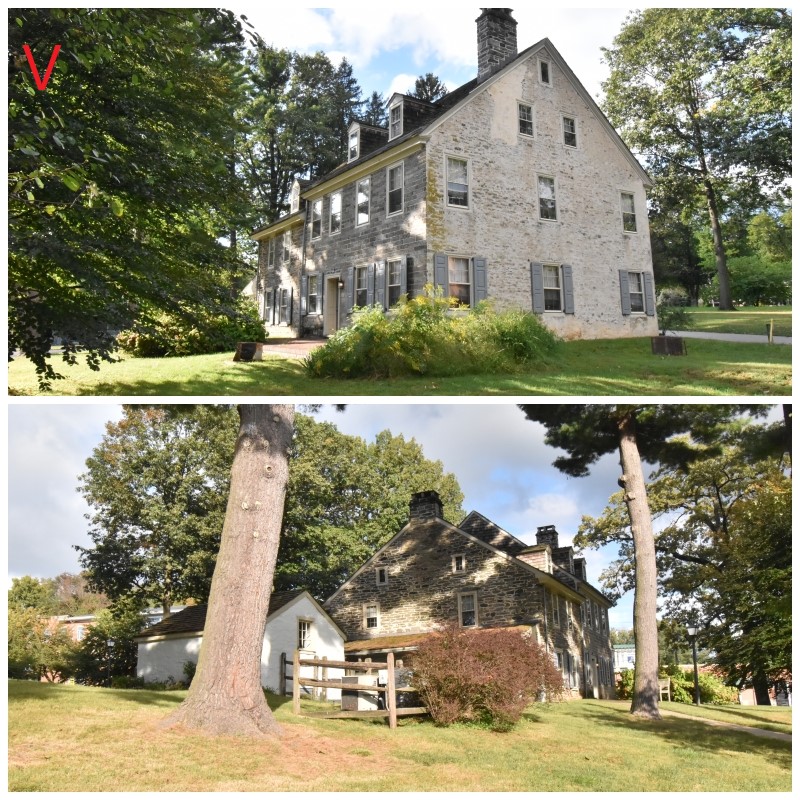
Photos T-U-V: The Wall House & Shoemaker’s Mill stop on the tour is located on Old York Road where it intersects with Church Road. The original home is in a small, surrounding park with several interpretive displays that describe the mill operations which occurred here (Photo U). On Dec. 8th, Howe began pulling his troops from their positions opposite the American lines along Camp Hill. The British Army moved down to Old York Road and then turned right towards Philadelphia. The main army would have marched down the road towards the camera in the top photo. Grey’s troops left their positions and marched down Church Road to this location, having been harassed by some American troops along the way. His unit stopped here and took the opportunity to loot and damage the mills located here.

The tour takes you back to the starting point at Fort Hill, however there is no reason to return to this location if you don’t have to. That is the end of the Battle of Whitemarsh.
Not soon afterwards Washington crossed back onto the west side of the Schuylkill River and onto Valley Forge for the winter.
Link to the driving tour narrative including footnotes.
Main website: https://battleofwhitemarsh.weebly.com/
Print this narrative and use for the tour:
https://battleofwhitemarsh.weebly.com/uploads/1/0/0/7/100797142/binder3.pdf
Here is the link to the driving tour map:
https://www.google.com/maps/d/viewer?mid=13jNwmDTjxw1yq6q6_DlKwy11zFjzeOMo&ll=40.04443758460859%2C-75.14384776353836&z=3
